User Interface
The user interface consists of a 3D viewing window (usually called the viewer) and number of docks and toolbars that can be customised based on the users preferences.
Viewer
The viewer is a 3D viewing window the the user to view the workcell, any workpieces that have been imported, and the welds in the project.
Selection
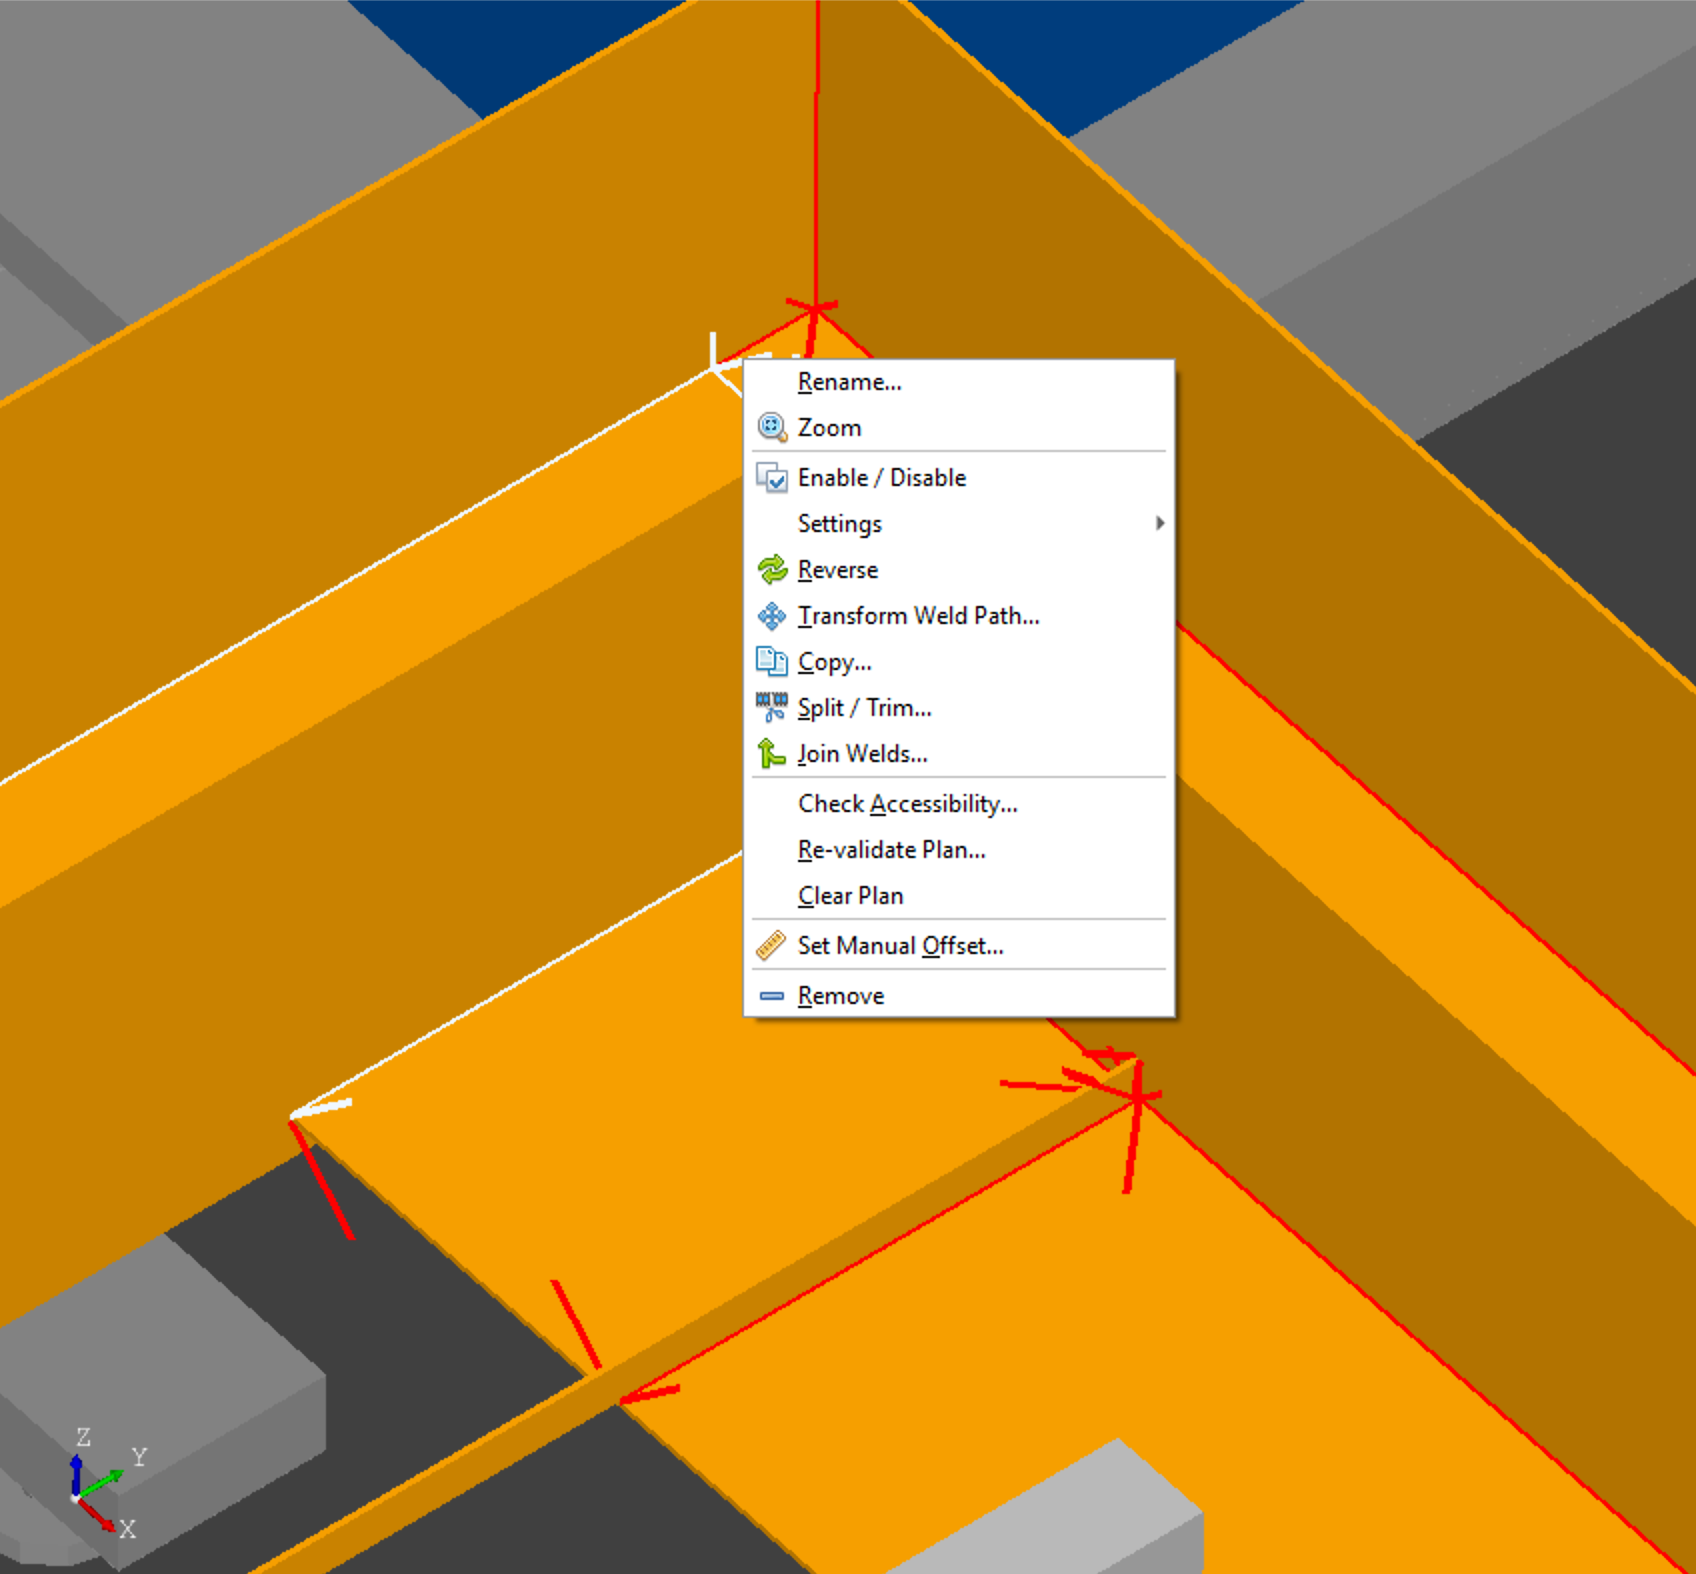
Within the viewer, parts and welds can be selected by left clicking on the item. Multiple items can be selected by either control-clicking each part individually or holding the shift button while dragging to activate a selection box. To when multiple items are selected, use control-right-click to activate the context menu.
Docks and Toolbars
Reset Layout
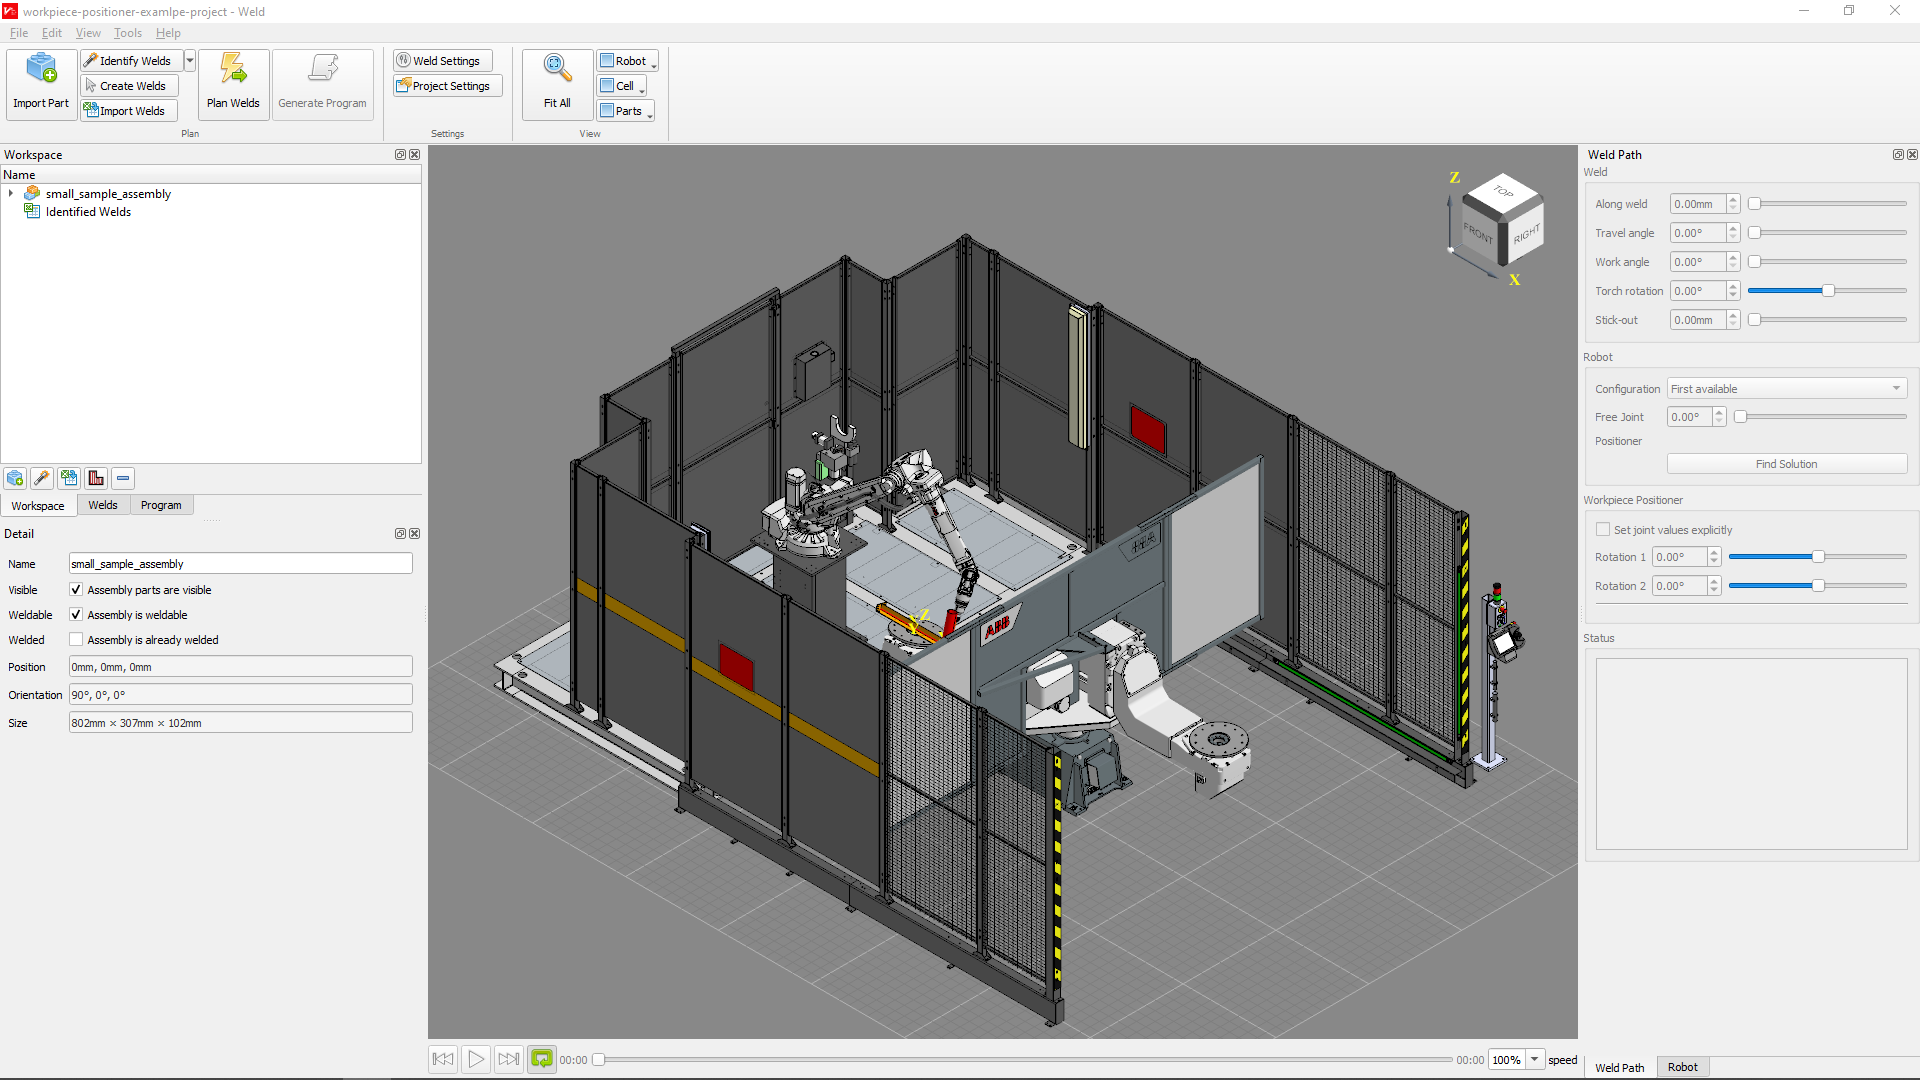
The user interface can be reset from the view menu. View > Reset Layout. This will reset the user interface layout to match the screenshot below.
Ribbon
The ribbon is positioned at the top of the screen. It cannot be un-docked or moved.
View Controls
The ribbon contains the following view controls:
Fit All: zooms to fit all items with the viewer.
Robot: change the view mode for the robot (Solid, Hidden).
Cell: change the view mode for the cell (Solid, Hidden).
Parts: change the view mode for the parts (Solid, Transparent, Hidden).
Workspace
The Workspace Widget is positioned in a shared space at the top left of the interface by default. It consists of a list of parts and assemblies within the project along with any weld groups that were identified or imported.
Welds
The Welds Widget is positioned in a shared space at the top left of the interface by default. It consists of a list of welds within the project. The welds widget can be filtered to only display welds that meet the filtered criteria. See Filtering.
The order of welds in the Welds Widget dictates the program order in the Program Widget and in the generated output.
Program
The Program Widget is positioned in a shared space at the top left of the interface by default. It consists of a list of actions detailing the sequence of operation for the project. This forms the output sequence that will be generated.
Detail
The Detail Widget is positioned at the bottom left of the interface by default. It provides detailed information of the selected item. See Assembly and Part Detail or Weld Detail.
Robot
The Robot Widget is positioned at the right of the interface by default. It provides a number of sliders that can be used to move the dynamic elements of the workcell (robot, positioner, tailstock position etc.) It also displays the current TCP in the workspace (note that the TCP value displayed may be different to the TCP positions that are in the generated code output) and status information of the robot.