17. Project Settings
Tutorial
This tutorial will cover the properties you can adjust in project settings, as well as the various parameters you can specify in relation to program generation.
Prerequisites and Resources
Before starting with the tutorial, ensure to have the Yaskowa Motoman example cell downloaded and imported into Verbotics Weld. This cell is available to download from the examples page on our website.
This walkthrough also uses the project settings example project which can be downloaded here.
Video Tutorial
Step by Step Guide
Step 1 - General Project Settings
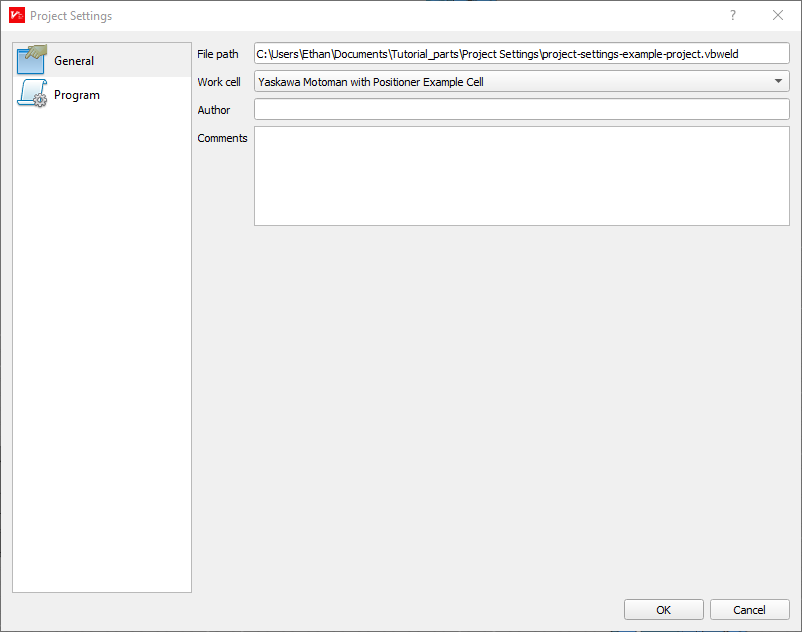
Once loaded into the example project, open up the project settings window which you can find in the settings tab in the ribbon menu.
General Project Options
In project settings, you’ll find the list of project setting types on the left and the selected setting parameters on the right. Start with the “General Project Settings”. This section is where you can:
See where the project is currently saved, which is useful if you accidentally save the project to an unknown location.
Change our selected cell, we currently have the yaskowa motoman selected but if you have other cells imported into verbotics you can quickly swap between them here.
Specify a project author.
Add comments for the project, useful for teams working on the same project.
Note
Changing the project cell will remove any weld plans from the project, and you may have to reposition your parts to better suit the new cell.
Step 2 - Program Project Settings
The next section of the project settings contains all the options relating to the program creating/generation within the project. The options here include:
Adjust the TCP
Operations
Set Weld/Sense Groups
When to create a cut wire motion
When to create a clean torch motion
When to delay torch cleaning
Setting a workcell home
Set transition and welding speeds
Adjusting the Tool Centre Point
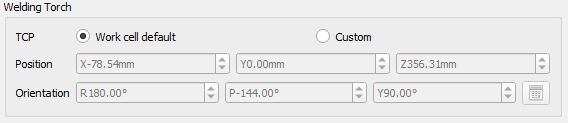
By default, the TCP will follow the position specified by the workcell default. However, there is also a custom option to specify this location. This is useful if the torch has been moved slightly from a minor bump for example.
Note
If the TCP has changed significantly from the cell’s original TCP, a new/updated workcell should be obtained
For example, the robot we’re using in our real-world workshop was accidentally bumped, and the TCP was measured to have shifted by 3mm in the X-axis. As such, we can apply this adjustment by selecting custom and setting the X value to 75.54mm which is a 3mm increase to the default value.
TCP Options
Operations Options
By default, the only option enabled in the operations is Cut wire between welding and touch sensing. Which if you quickly return to the viewer and look at the program tab, you’ll notice our program has no cleaning operations but does have plenty of wire cutting motions. The operations options allow us to adjust the inclusion of these additional motions.
Operations Options
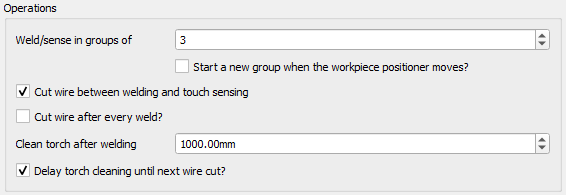
Returning back to the project settings, let’s start with the weld/sense groups options. With this option, we can set the program to group sensing motions and welding motions together instead of returning home after each motion. Let’s set this to 3.
Next, let’s also set the program to start cleaning the torch by adjusting the Clean torch after Welding value to 1000mm.
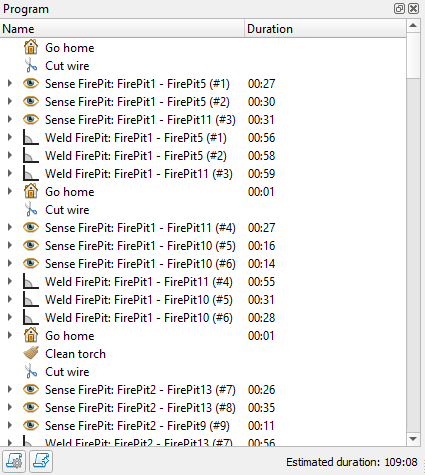
Go ahead and return to the program tab, where you’ll see now the program consists of groups as well as now has cleaning motions. However, now some of the new cleaning steps interrupt our welding sets.
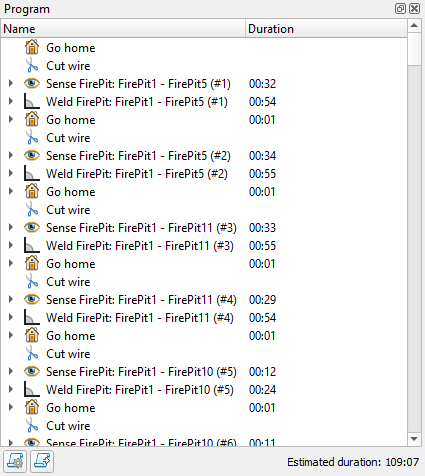
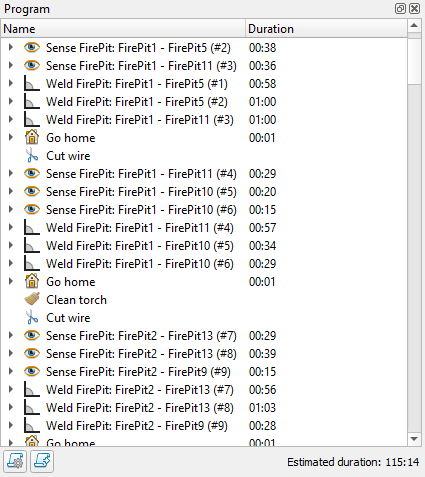
We can stop this by enabling Delay torch cleaning until next wire cut. Now, we can see our program follows a sequence of Homing, cutting the wire, performing 3 senses, 3 welds and then a final clean if 1000mm of weld has been performed.
Default Operation Settings |
New Operation Settings |
|---|---|
|
|
Work Cell Home
Here we can specify the home position for the workcell, by default this is always the cell’s own default value, however we can specify a custom position here. We can specify the exact rotation of every joint for home position.

Home Options
Transition and Welding Speeds
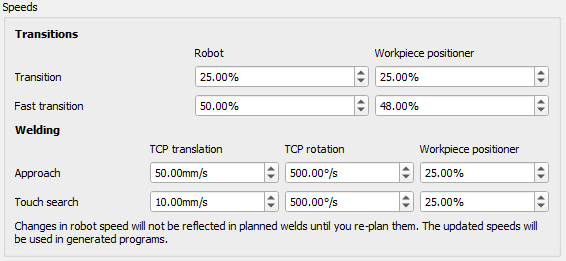
Here, we can specify the output speed for each type of motion. Adjusting these speeds can be useful for many specific projects, but it’s important to understand and acknowledge the capabilities of your chosen cell before adjusting these.
Speed Options
For our program, we’ve got an assembly line which needs the part to be welded in no more than 110 minutes. Our program takes just over 116 minutes which doesn’t hit this target. The robot being used today is capable of achieving a faster weld speed, as such we can increase this in our program settings in order to meet the required completion time.
Start by adjusting the Robot and Positioner transition speeds. These values are in percentages of the robots maximum speed. Increase each speed value by 5%.
Next, we can adjust the welding speed. These options allow you to adjust the approach and touch search speeds for the TCP positioning and workpiece. For this project, while the touch search speed needs to stay accurate as such leave these speeds as they are, we know we can increase the approach speeds slightly, as such, set the TCP translation approach speed to be 65 mm/s.
Now, we can click OK and replan our program to see how our adjusted speeds have effected our program time.
Once the planning completes, we can see our speed’s been reduced to 109 minutes and 8 seconds, just coming within required completion time.
Default Speed Settings |
New Speed Settings |
|---|---|
|
|