7. Weld Management
Tutorial
This tutorial looks at the management of pre-existing welds in your projects, and the various management functions available for you to use.
Prerequisites and Resources
Before starting with the tutorial, ensure to have the ABB FlexArc example cell downloaded and imported into Verbotics Weld. This cell is available to download from the examples page on our website.
This tutorial also uses the Weld Management example project which can be downloaded here.
Video Tutorial
Step by Step Guide
Step 1 - Copying Welds
Verbotics Weld’s Copy function has 3 options when it comes to copying welds, which we’ll explore one by one, starting with the first option “copy along a direction”.
Copy Along a Direction
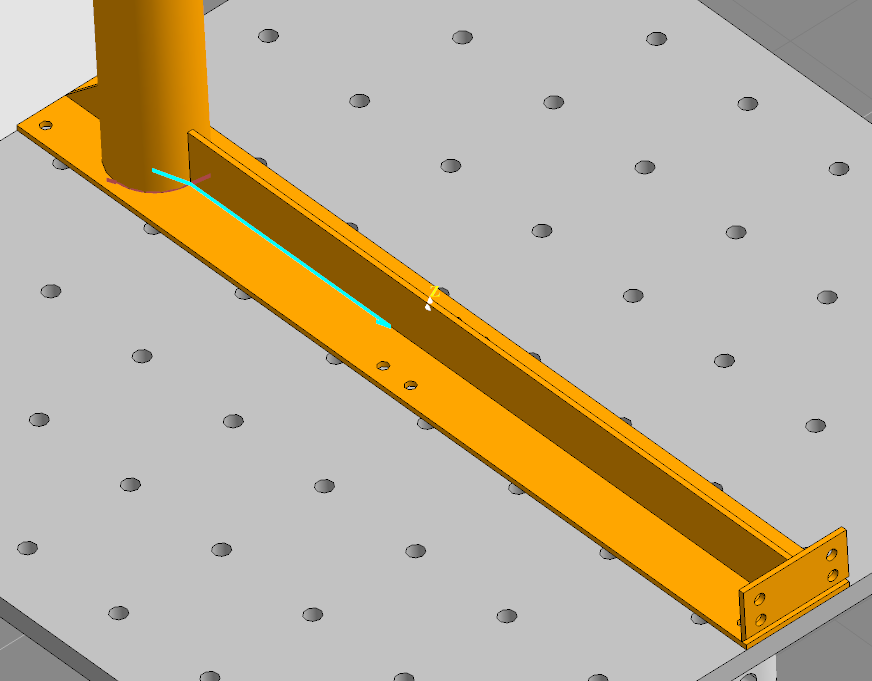
Select the weld labelled “Straight Weld” from the welds tab. You’ll see this weld covers a short section of the parts straight, long edge. We want an additional 2 short welds along this length. With the “Straight Weld” still selected, right click the weld and then click Copy.

Copy Button in the Context Menu
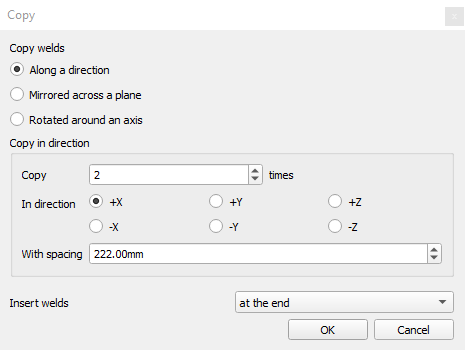
The window that opens is the copy function. For this weld, we want to select the option Along a direction. Now, we can select the options to copy our weld as we want it.
Copy Welds Window
We want 3 welds total, so we’ll set the number of copies to
2.As the path travels along the positive X direction, we’ll also want to select
+X.We need to specify how far each copy should be spaced. As the length of the original weld is 220mm, and we also want a small gap in between each weld, we’ll set
with spacingto be222mm.
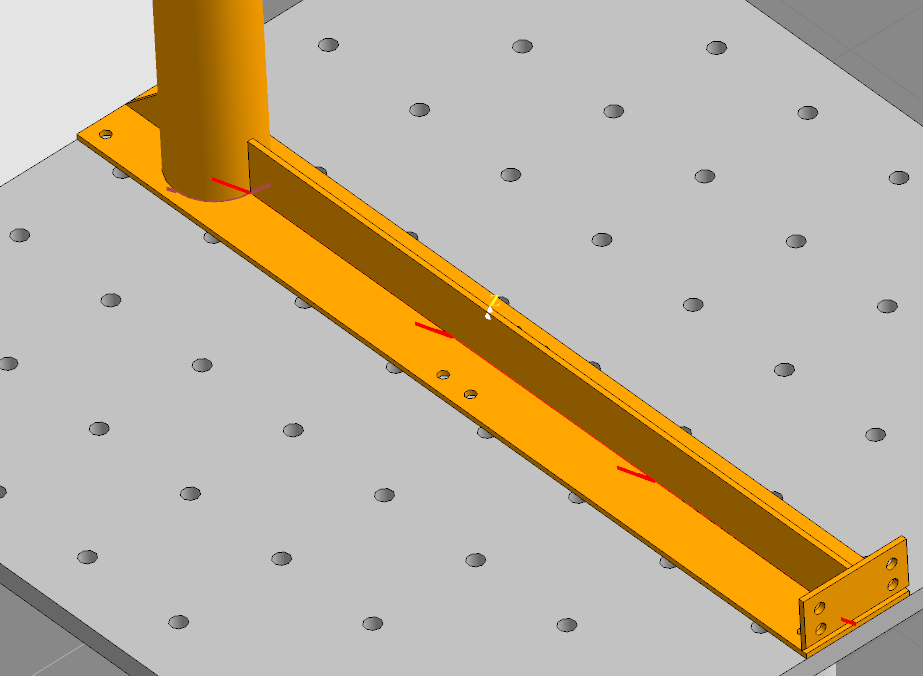
Now click OK to successfully copy the weld along this straight direction.
Before |
After |
|
|
Rotated Around an Axis
For curved welds revolving around a point, we’ll need to use a different copy option. Go ahead and right-click “Curved Weld” from the welds widget, then open the copy function.
This time, select Rotated around an axis as the copy option. With this, we copy the “Curved Weld” around the base of the cylinder.
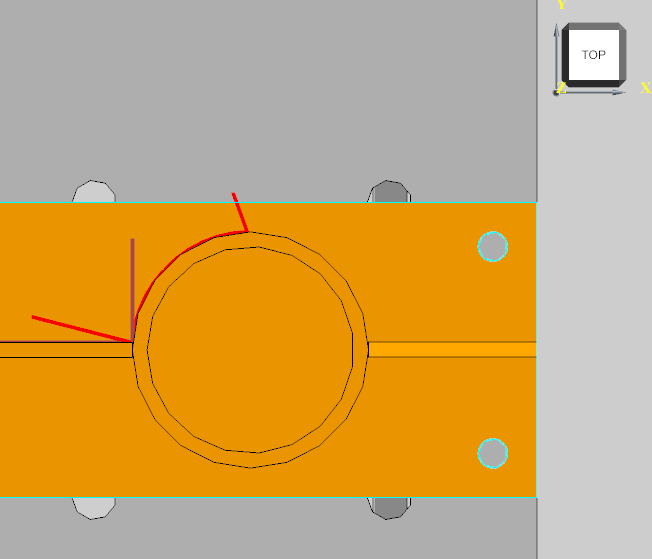
Original Single Curved Weld
Before we can copy, we once again need to select and specify all the necessary options and values:
We need to specify the
axis centre, which is the point to rotate the weld around. The cylinders centre is located at an X value of-303.44mm, so enter that into the centre value.Specify the
axis direction, which we want each value to be0, except for Z which should be1.Set the
angle between copiesto-90 degrees, which we can do by disablingautomatically calculateand updating the final value.
Click OK, and now we can see the weld has been copied around the base.

Rotated Around Axis Options and Generated Copy
Mirror Across a Plane
At this point, you may have noticed that all our welds only exist on one side of the part, but we’d like these welds to be placed on both sides. Go ahead and select all of our current welds, and once again open the copy function. Select the Mirrored across a plane option.
For this copy mode, all we have to do is set Y to 1, telling Verbotics Weld to mirror across the Y plane. Click OK, and we have successfully mirrored all our welds onto the other side of the part.
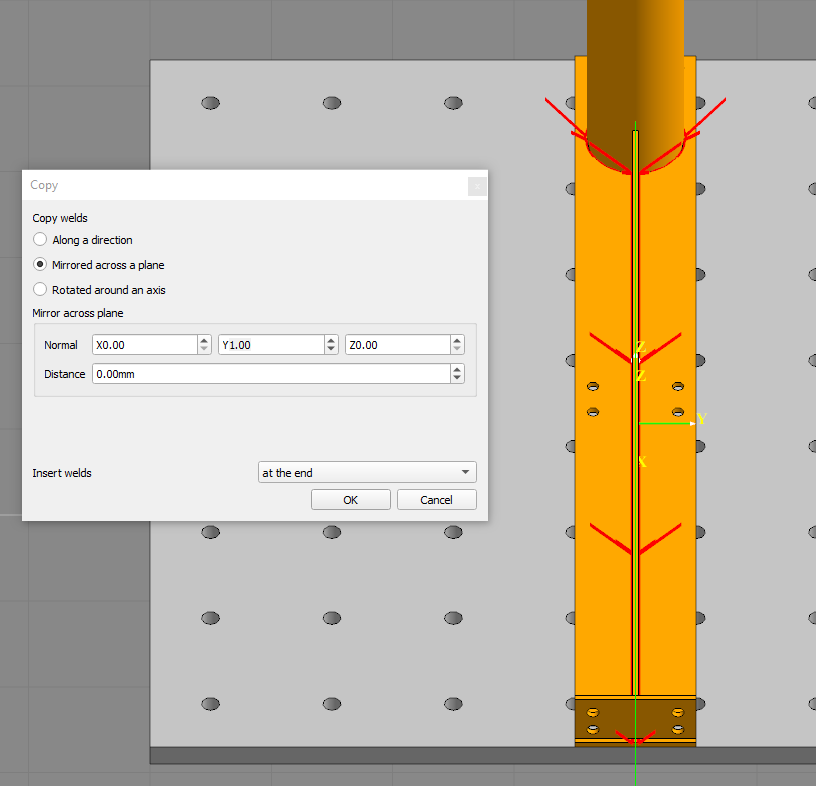
Mirror Welds Options and Generated Copies
Step 2 - Renaming Welds
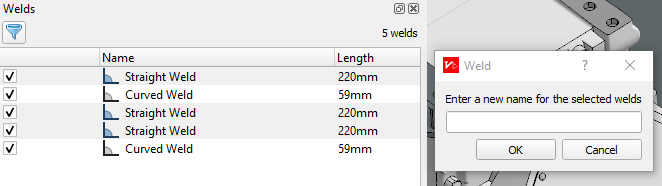
With all these new copied welds, many of our welds share names. We could go through and manually right click and rename everyone weld like this. However, for project with hundreds of welds this is repetitive and tedious, so instead we’ll use the built-in bulk renaming function.
Start by selecting all the welds labelled “straight”, then right clicking and select rename. In this dialogue box, we can specify a name to classify all these welds as, then verbotics will number each one automatically. Let’s enter a name then click OK.
Bulk Renaming Function
While bulk naming is useful, we may have welds which we want to specify have special properties. For our example project, we want to specify the front facing, and rear facing welds without changing their names to do so. For this, we can use the tags feature in the details widget. Go ahead and select all the front facing welds, then in the tags box type “front”. Upon hitting enter, all of our front facing welds can now be seen having that extra classification as a front facing weld.
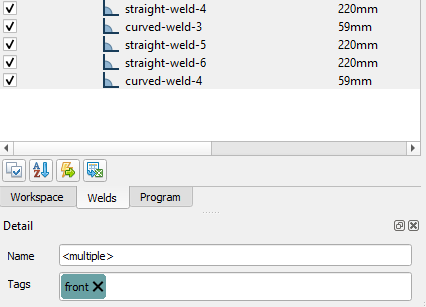
Creating and Adding a “Front” Tag for the Selected Welds
Step 3 - Sorting Welds
The sort welds function has several options when it comes to ordering your welds. These include:
Alphabetical- Sorts welds alphabeticallySpiral- Sorts welds from the furthest to closest position of each weld when compared to the average position of all welds being sorted.Furthest to next and closest to next- Sorts welds depending on the next furthest or closest weld from the previous respectivelyPosition- Sorts welds depending on the order they occur when traveling upon a specified axis.Group touching welds- Groups welds together that have starts and/or ends less than 2mm from one another.Workpiece positioner value- Sorts welds based on the workpiece position during the welding operation. However, this option only works when you’ve already planned the welds and is useful for reducing the amount of time the workpiece positioner spends adjusting.
Sort Welds Options
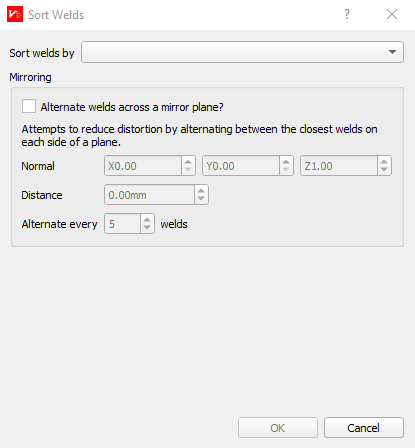
In addition to these sorting options, there is also the alternate welds across a mirror plane option which takes the sorted welds on two sides of a symmetrical plane and alternates them.
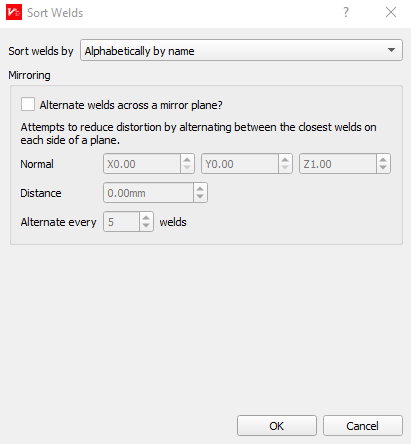
Mirroring option for Sorting Welds
For this example, we’ll keep it simple and select alphabetical, however for your own projects make sure to identify and use the option that best suits your project, as sorting your welds in the optimal order can help to reduce the time taken to complete welding programs.