18. Re-validation
Tutorial
In this tutorial, we’re going to explore the re-validate operation and how to use it to re-evaluate welds after the addition and alteration of assembly parts.
Prerequisites and Resources
Before starting with the tutorial, ensure to have the Universal Robots UR10e example cell downloaded and imported into Verbotics Weld. This cell is available to download from the examples page on our website.
This walkthrough uses the revalidate example project and the revalidate example part.
Video Tutorial
Step by Step Guide
The Re-Validate Function
The revalidate plans operation checks the currently selected weld plans for any sort of collision or issue. This is extremely useful for when you make adjustments to assemblies or import a new part after planning your welds.
Our current example project already has been fully prepared with identified and planned welds. However, we need to add an additional bracket onto the centre of the assembly, so using the import part function, add the revalidate bracket part into the project.
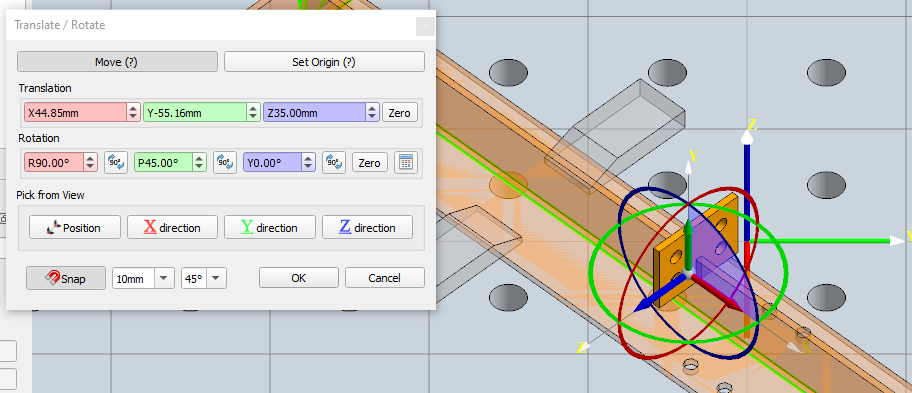
Once imported, reposition it according to the values shown in the table below:
Transform X |
30.7 mm |
Transform X |
-69.30 mm |
Transform X |
35.00 mm |
Rotate R |
90° |
Rotate P |
45° |
Rotate Y |
0° |
With a new part introduced onto the workpiece, we need to ensure that our already planned motions won’t collied with this part. You can do this by selecting all of the welds, right clicking and then selecting Re-validate plan.

Re-validating Welds
In the window that loads, you’ll notice every single weld having its validation status re-checked. Scrolling through, you should find several welds have now actually returned an invalid status. Generally, this will only require a quick re-planning of the invalid welds to now consider the bracket path when planning their motion pathways.
Another scenario where re-validating weld plans is essential is whenever parts within a workpiece assembly are moved. Select the bracket part and open the transform/rotate window. Now, shift the bracket along the part towards one of the 2 ends by clicking and dragging the red arrow.
Repositioning the Bracket
Once again, re-validate all of the weld plans and take note of the new collisions detected. Often, we can just re-plan these welds, however sometimes these collisions may be unavoidable and the invalid welds will have to be edited to be completed around the new obstacles. See Weld Editing for a guide on this topic.