9. Weld Accessibility
Tutorial
This tutorial looks at the accessibility of welds in your project, specifically how you can check if they are accessible and how to alter welds to make them more accessible.
Prerequisites and Resources
Before starting with the tutorial, ensure to have the Yaskowa Motoman with Large example cell downloaded and imported into Verbotics Weld. This cell is available to download from the examples page on our website.
This walkthrough also uses the Weld Access example project which can be downloaded here.
Video Tutorial
Step by Step Guide
Identifying the Accessibility of Welds
This tutorial’s example project looks at welding a simple trailer consisting of an RHS frame. Parts utilising an RHS frame generally have welds also identified on the inside of the RHS components too, which won’t be accessible by our robot.
We need to identify which of our welds are inaccessible and remove them, which we can do by selecting all of the welds in the project (ctrl+A while in the welds widget), then right clicking and selecting the Check Accessibility option.
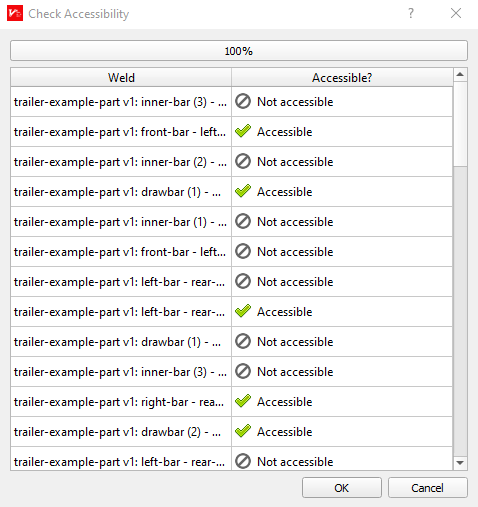
Check Accessibility Function
Note
The check accessibility function works by checking the start, middle and end of each weld to ensure that a collision-free position for the weld torch exists within our projects weld settings.
In the window that loads, you’ll see each of our welds on the left, and on the right whether they are accessible. Once this completes, we can click OK and all of our welds will be updated to show if they are accessible. Inaccessible welds will be marked with a grey strike-out symbol.
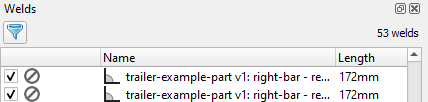
Inaccessible Weld Shown with a Strikeout Symbol
Causes of Weld Inaccessibility
There are various reasons as to why a weld is inaccessible, the most common being internal welds, If we select one of the welds labelled as inaccessible, we can see it’s been highlighted as inside the RHS bar. Identifying these as inaccessible is useful, as we can go ahead and remove all the internal welds to reduce clutter in our project.
However, not all inaccessible welds will be internal welds. Let’s focus on the welds widget and navigate to the weld titled “drawbar narrow weld”. In this case, the section we want to weld is in an extremely narrow and tight area. With our current weld settings, this is inaccessible.
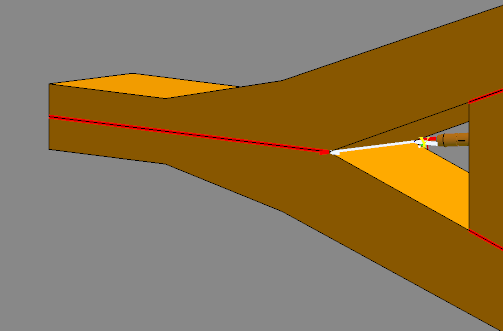
Inaccessible Weld due to Narrow Location
Sometimes, we can improve and enable the accessibility of some of these welds by using specific weld settings. For the narrow weld we just identified, a specific weld setting allowing for greater range of movement has been created. Swap this weld’s process setting to the “Narrow Weld Settings”. Go ahead and re-access the welds accessibility, which should now return an accessible result.
Some welds may also need splitting/trimming to enable access, however this is covered in our weld editing tutorial.
Note
Importing fixtures into your project may cause also inaccessibility, so always ensure to rerun the Check Accessibility function once you’ve imported all your parts.