9. Weld Accessibility
Tutorial
This tutorial looks at the accessibility of welds in your project, specifically how you can check if they are accessible and how to alter welds to make them more accessible.
Prerequisites and Resources
Before starting with the tutorial, ensure to have the UR10e example cell downloaded and imported into Verbotics Weld. This cell is available to download from the examples page on our website.
This walkthrough also uses the Weld Access example project which can be downloaded here.
Video Tutorial
Step by Step Guide
Step 1: The Accessibility Checker
In the example project used for this tutorial, you’ll find 2 parts with several welds identified. Both of these parts have welds that are either impossible to access by the robot, or are inaccessible in their current state.
To reduce clutter in a project, and to determine which welds need adjusting for access, its essential to know how to identify inaccessible welds in your projects.
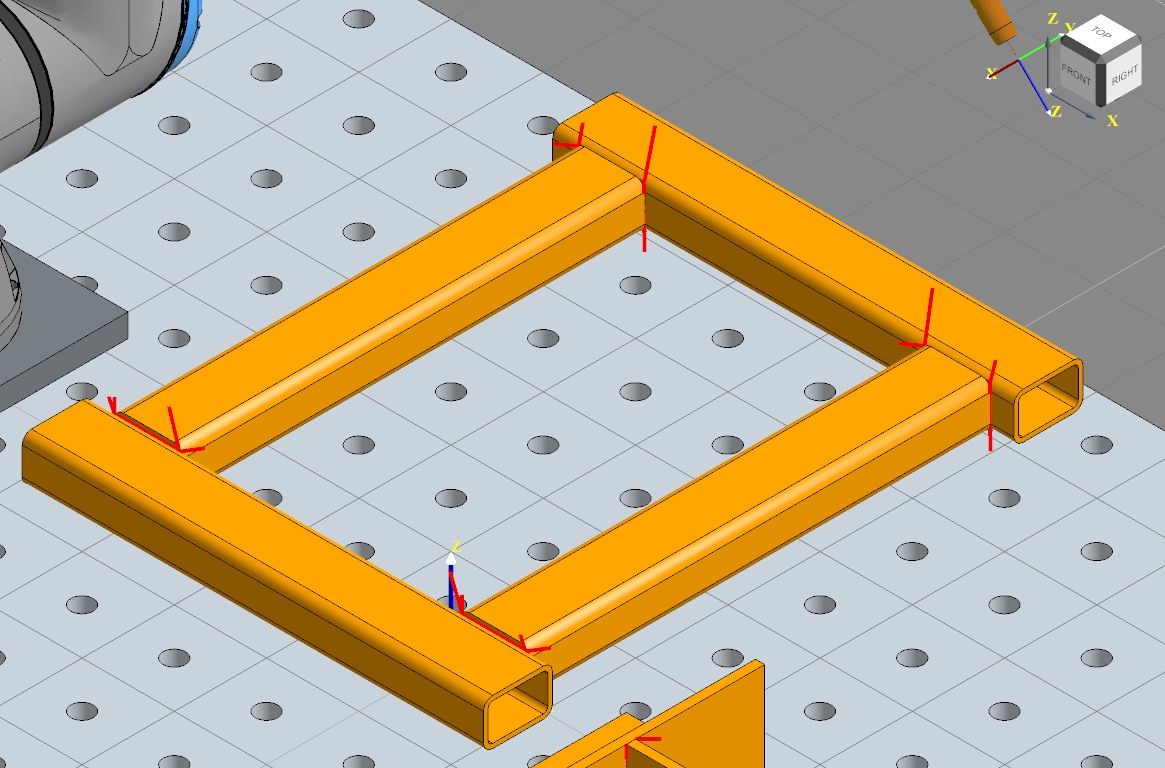
Start with the RHS frame part, and the 32 welds which have been identified to complete the part. Use the filter options and set the tag to RHS to hide the other part’s welds.

RHS Part
Once only the RHS welds are visible, examine the part and take note of the currently visible welds. At this point, you should only be able to find 16 of the 32 welds identified for the part. The reason for this, is that the other 16 welds are inside the hollow bars making up the frame. During the weld identification process, welds can often be identified inside hollow parts.
These additional 16 welds are impossible to access by the robot, and as such add unneeded clutter to the project. You’ll need to determine which of the 32 welds are inaccessible and remove them from the project. To do this, you’ll need to use the Accessibility Checker.
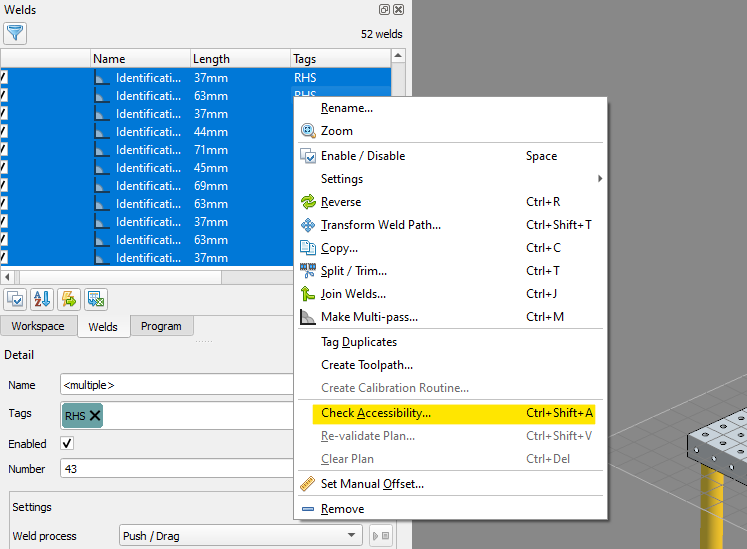
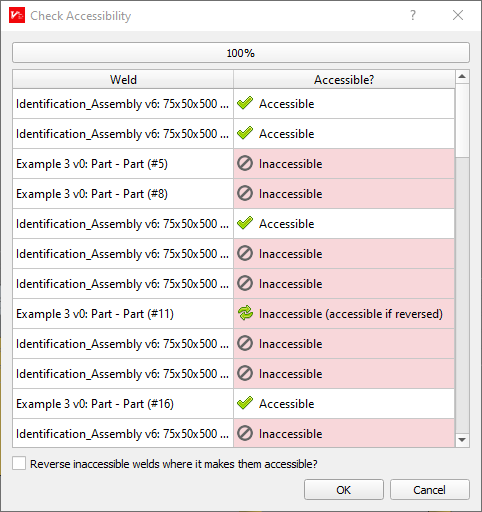
Select all of the RHS welds, right click, then select Check Accessibility. The Accessibility checker will run automatically upon loading and identify every selected weld as either accessible or not accessible

Accessibility Checker Location

Accessibility Checker Dialogue
Note
The check accessibility function works by checking the start, middle and end of each weld to ensure that a collision-free position for the weld torch exists within our projects weld settings.
Once the function completes, click OK and now you’ll find each of the inaccessible welds will be marked in the welds pane with a grey strike-through symbol  . This allows you to easily select each inaccessible weld to then remove them from the project.
Step 2: Reversing Inaccessible Welds
Moving onto the next part’s welds now, you may have noticed an additional option in the accessibility checker relating to reversing welds to make them accessible. Some welds in a project may only be inaccessible due to the direction the weld is to be completed in.
You’ll look at an example of a few of these welds now, in the filter dialogue, check the invert box to see all welds that don’t have the RHS tag.
If you look at these welds, you’ll notice almost all of the welds require either pushing into or dragging out of a corner. However, these welds have all be set to only complete push welds, making welds that start at the corner impossible to access.

Welds Pushing or Dragging into Corners
However, reversing these welds to instead start outside the corner will enable access. Using the accessibility checker, you’ll determine which welds are able to be accessed when reversed, and additionally reverse all welds identified as requiring reversal.
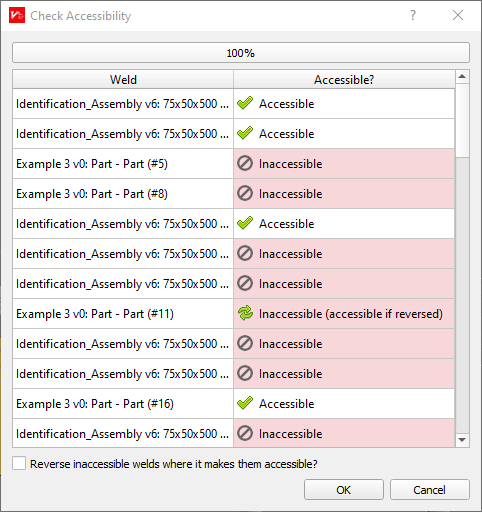
Select all the welds, then run the accessibility checker. Notice many of the welds are identified as needing reversing  .
.
Before clicking OK, take note of the additional checkbox at the bottom of the checker, labelled Reverse inaccessible welds where it makes them accessible. Go ahead and enable this checkbox. Now, if you go ahead and click OK, you’ll find many of the welds are now reversed and hence now made accessible.

Reversing Welds
There are many other reasons as to why a weld is inaccessible, the most common being the internal welds and corner welds we just looked at.
Sometimes, you can improve and enable the accessibility of some of these welds by using specific weld settings. For example, the push welds we just reversed also could’ve had their settings changed to instead use a drag weld. Other times, welds may instead need splitting/trimming to enable access, however for examples and a more in-depth guide on this, see our Weld Process Settings Tutorial.
Note
Importing fixtures into your project may cause also inaccessibility, so always ensure to rerun the Check Accessibility function once you’ve imported all your parts.